k8s部署dns组件和heapster监控(十二)
k8s部署dns组件和heapster监控
dns组件是为整个k8s提供dns服务的,有dns,在连接其他资源时就可以用资源名来连接即可
1.安装dns组件
1.1.获取dns组件所需的镜像
[root@k8s-master dns]# docker pull docker.io/gysan/kube-dnsmasq-amd64
[root@k8s-master dns]# docker pull docker.io/ist0ne/kubedns-amd64
[root@k8s-master dns]# docker pull docker.io/ist0ne/dnsmasq-metrics-amd64
[root@k8s-master dns]# docker pull docker.io/huangyj/exechealthz-amd64

将镜像导出方便下次使用
[root@k8s-master docker]# for i in `docker images | egrep 'dns|exec' | grep '^d' | awk '{print $1}'`
> do
> image=`echo $i | awk -F "/" '{print $3}'`
> docker save $i > ${image}.tar.gz
> done
1.2.将镜像打标签推送至镜像仓库
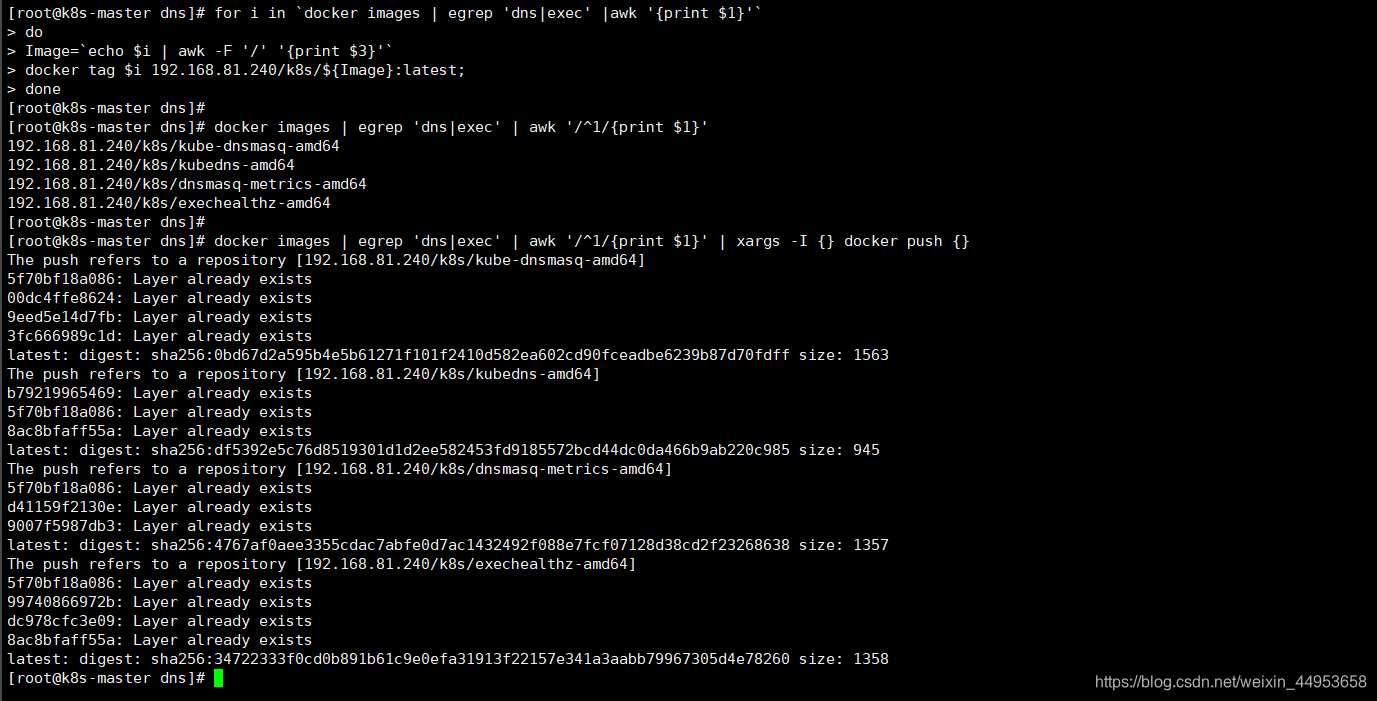
由于镜像较多,因此我们对镜像批量打标签
[root@k8s-master dns]# for i in `docker images | egrep 'dns|exec' |awk '{print $1}'`
> do
> Image=`echo $i | awk -F '/' '{print $3}'`
> docker tag $i 192.168.81.240/k8s/${Image}:latest;
> done

[root@k8s-master dns]# docker images | egrep 'dns|exec' | awk '/^1/{print $1}'
192.168.81.240/k8s/kube-dnsmasq-amd64
192.168.81.240/k8s/kubedns-amd64
192.168.81.240/k8s/dnsmasq-metrics-amd64
192.168.81.240/k8s/exechealthz-amd64

批量推送至harbor
[root@k8s-master dns]# docker images | egrep 'dns|exec' | awk '/^1/{print $1}' | xargs -I {} docker push {}
1.3.编辑deployment资源文件
[root@k8s-master dns]# vim skydns-deploy.yaml
# Copyright 2016 The Kubernetes Authors.
#
# Licensed under the Apache License, Version 2.0 (the "License");
# you may not use this file except in compliance with the License.
# You may obtain a copy of the License at
#
# http://www.apache.org/licenses/LICENSE-2.0
#
# Unless required by applicable law or agreed to in writing, software
# distributed under the License is distributed on an "AS IS" BASIS,
# WITHOUT WARRANTIES OR CONDITIONS OF ANY KIND, either express or implied.
# See the License for the specific language governing permissions and
# limitations under the License.

# TODO - At some point, we need to rename all skydns-*.yaml.* files to kubedns-*.yaml.*
# Should keep target in cluster/addons/dns-horizontal-autoscaler/dns-horizontal-autoscaler.yaml
# in sync with this file.

# __MACHINE_GENERATED_WARNING__

apiVersion: extensions/v1beta1
kind: Deployment
metadata:
  name: kube-dns
  namespace: kube-system
  labels:
    k8s-app: kube-dns
    kubernetes.io/cluster-service: "true"
spec:
  replicas: 1
  # replicas: not specified here:
  # 1. In order to make Addon Manager do not reconcile this replicas parameter.
  # 2. Default is 1.
  # 3. Will be tuned in real time if DNS horizontal auto-scaling is turned on.
  strategy:
    rollingUpdate:
      maxSurge: 10%
      maxUnavailable: 0
  selector:
    matchLabels:
      k8s-app: kube-dns
  template:
    metadata:
      labels:
        k8s-app: kube-dns
      annotations:
        scheduler.alpha.kubernetes.io/critical-pod: ''
        scheduler.alpha.kubernetes.io/tolerations: '[{"key":"CriticalAddonsOnly", "operator":"Exists"}]'
    spec:
      containers:
      - name: kubedns
        image: 192.168.81.240/k8s/kubedns-amd64:latest			#修改镜像地址
        resources:
          # TODO: Set memory limits when we've profiled the container for large
          # clusters, then set request = limit to keep this container in
          # guaranteed class. Currently, this container falls into the
          # "burstable" category so the kubelet doesn't backoff from restarting it.
          limits:
            memory: 170Mi
          requests:
            cpu: 100m
            memory: 70Mi
        livenessProbe:
          httpGet:
            path: /healthz-kubedns
            port: 8080
            scheme: HTTP
          initialDelaySeconds: 60
          timeoutSeconds: 5
          successThreshold: 1
          failureThreshold: 5
        readinessProbe:
          httpGet:
            path: /readiness
            port: 8081
            scheme: HTTP
          # we poll on pod startup for the Kubernetes master service and
          # only setup the /readiness HTTP server once that's available.
          initialDelaySeconds: 3
          timeoutSeconds: 5
        args:
        - --domain=cluster.local.
        - --dns-port=10053
        - --config-map=kube-dns
        - --kube-master-url=http://192.168.81.210:8080 #master api地址
        # This should be set to v=2 only after the new image (cut from 1.5) has
        # been released, otherwise we will flood the logs.
        - --v=0
        #__PILLAR__FEDERATIONS__DOMAIN__MAP__
        env:
        - name: PROMETHEUS_PORT
          value: "10055"
        ports:
        - containerPort: 10053
          name: dns-local
          protocol: UDP
        - containerPort: 10053
          name: dns-tcp-local
          protocol: TCP
        - containerPort: 10055
          name: metrics
          protocol: TCP
      - name: dnsmasq
        image: 192.168.81.240/k8s/kube-dnsmasq-amd64:latest			#dnsmasq镜像地址
        livenessProbe:
          httpGet:
            path: /healthz-dnsmasq
            port: 8080
            scheme: HTTP
          initialDelaySeconds: 60
          timeoutSeconds: 5
          successThreshold: 1
          failureThreshold: 5
        args:
        - --cache-size=1000
        - --no-resolv
        - --server=127.0.0.1#10053
        #- --log-facility=-
        ports:
        - containerPort: 53
          name: dns
          protocol: UDP
        - containerPort: 53
          name: dns-tcp
          protocol: TCP
        # see: https://github.com/kubernetes/kubernetes/issues/29055 for details
        resources:
          requests:
            cpu: 150m
            memory: 10Mi
      - name: dnsmasq-metrics
        image: 192.168.81.240/k8s/dnsmasq-metrics-amd64:latest			#dnsmasq-metrics进行地址
        livenessProbe:
          httpGet:
            path: /metrics
            port: 10054
            scheme: HTTP
          initialDelaySeconds: 60
          timeoutSeconds: 5
          successThreshold: 1
          failureThreshold: 5
        args:
        - --v=2
        - --logtostderr
        ports:
        - containerPort: 10054
          name: metrics
          protocol: TCP
        resources:
          requests:
            memory: 10Mi
      - name: healthz
        image: 192.168.81.240/k8s/exechealthz-amd64:latest		#exechealthz-amd64镜像地址
        resources:
          limits:
            memory: 50Mi
          requests:
            cpu: 10m
            # Note that this container shouldn't really need 50Mi of memory. The
            # limits are set higher than expected pending investigation on #29688.
            # The extra memory was stolen from the kubedns container to keep the
            # net memory requested by the pod constant.
            memory: 50Mi
        args:
        - --cmd=nslookup kubernetes.default.svc.cluster.local 127.0.0.1 >/dev/null
        - --url=/healthz-dnsmasq
        - --cmd=nslookup kubernetes.default.svc.cluster.local 127.0.0.1:10053 >/dev/null
        - --url=/healthz-kubedns
        - --port=8080
        - --quiet
        ports:
        - containerPort: 8080
          protocol: TCP
      dnsPolicy: Default  # Don't use cluster DNS.


一共有5处修改
52行,修改kubedns-amd64镜像地址
85行,修改api-server镜像地址
104行,修改kube-dnsmasq-amd64镜像地址
132行,修改dnsmasq-metrics-amd64镜像地址
153行,修改healthz镜像地址
1.4.编辑svc资源文件
[root@k8s-master dns]# vim skydns-svc.yaml
# Copyright 2016 The Kubernetes Authors.
#
# Licensed under the Apache License, Version 2.0 (the "License");
# you may not use this file except in compliance with the License.
# You may obtain a copy of the License at
#
# http://www.apache.org/licenses/LICENSE-2.0
#
# Unless required by applicable law or agreed to in writing, software
# distributed under the License is distributed on an "AS IS" BASIS,
# WITHOUT WARRANTIES OR CONDITIONS OF ANY KIND, either express or implied.
# See the License for the specific language governing permissions and
# limitations under the License.

# TODO - At some point, we need to rename all skydns-*.yaml.* files to kubedns-*.yaml.*

# Warning: This is a file generated from the base underscore template file: skydns-svc.yaml.base

apiVersion: v1
kind: Service
metadata:
  name: kube-dns
  namespace: kube-system
  labels:
    k8s-app: kube-dns
    kubernetes.io/cluster-service: "true"
    kubernetes.io/name: "KubeDNS"
spec:
  selector:
    k8s-app: kube-dns
  clusterIP: 10.254.230.254
  ports:
  - name: dns
    port: 53
    protocol: UDP
  - name: dns-tcp
    port: 53
    protocol: TCP

基本不需要改动
1.4.创建资源
[root@k8s-master dns]# kubectl create -f skydns-deploy.yaml

[root@k8s-master dns]# kubectl create -f skydns-svc.yaml

或者
[root@k8s-master dns]# kubectl create -f /k8s/dns/
deployment "kube-dns" created
service "kube-dns" created
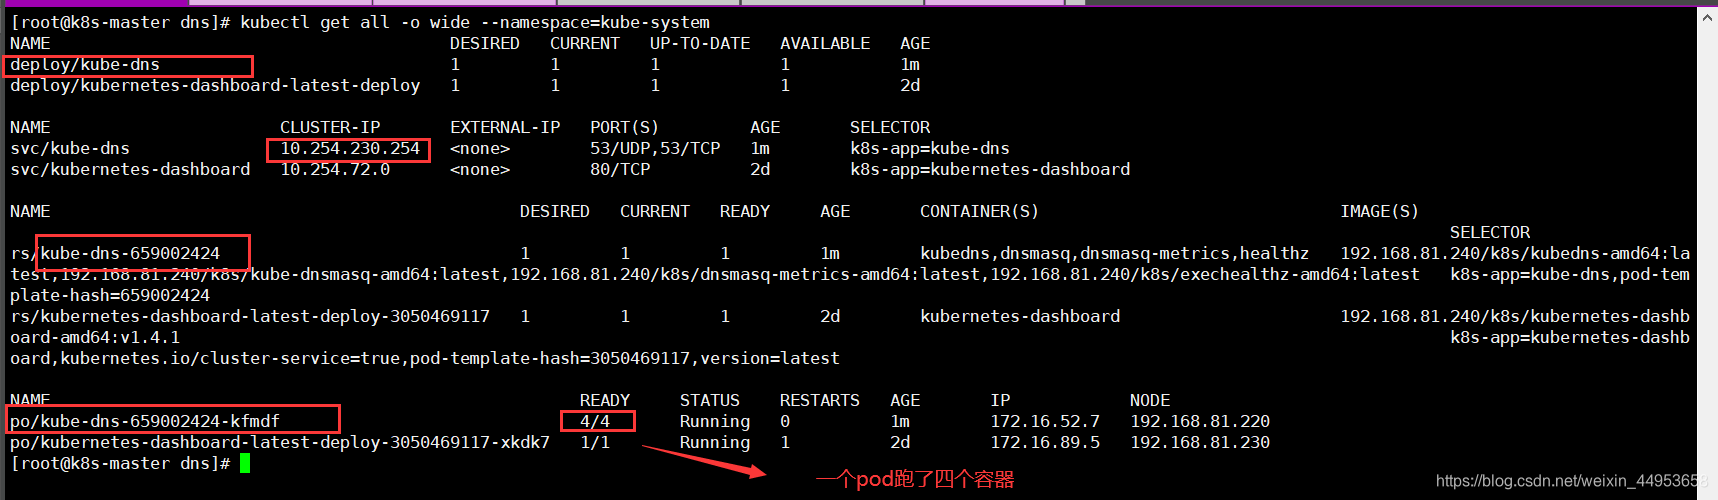
1.5.查看资源
[root@k8s-master dns]# kubectl get all -o wide --namespace=kube-system
1.6.在各节点增加dns配置
[root@k8s-node1 ~]# vim /etc/kubernetes/kubelet
KUBELET_ARGS="--cluster_dns=10.254.230.254 --cluster_domain=cluster.local"

[root@k8s-node1 ~]# systemctl restart kubelet
1.7.验证dns
[root@k8s-master dns]# vim test_dns.yaml
apiVersion: v1
kind: Pod
metadata:
  labels:
    name: busybox_dns
    role: master
  name: busybox
spec:
  containers:
  - name: busybox
    image: 192.168.81.240/k8s/busybox:latest
    command:
    - sleep
    - "36000"

[root@k8s-master dns]# kubectl create -f test_dns.yaml

[root@k8s-master dns]# kubectl exec -it busybox /bin/sh
/ # nslookup kubernetes.default.svc.cluster.local
Server:		10.254.230.254
Address:	10.254.230.254:53

Non-authoritative answer:
Name:	kubernetes.default.svc.cluster.local
Address: 10.254.0.1
1.8.将tomcat项目中的ip地址换成域名并测试应用
1)修改tomcatrc资源,连接mysql时使用域名
[root@k8s-master tomcat]# vim tomcat-rc.yml
apiVersion: v1
kind: ReplicationController
metadata:
name: mytomcat
spec:
replicas: 1
selector:
app: mytomcat
template:
metadata:
labels:
app: mytomcat
spec:
containers:
- name: mytomcat
image: 192.168.81.240/k8s/tomcat-app:v2
ports:
- containerPort: 8080
env:
- name: MYSQL_SERVICE_HOST
value: 'mysql' #这里从ip修改为域名
- name: MYSQL_SERVICE_PORT
value: '3306'
2)更新配置
[root@k8s-master tomcat]# kubectl apply -f tomcat-rc.yml
replicationcontroller "mytomcat" configured
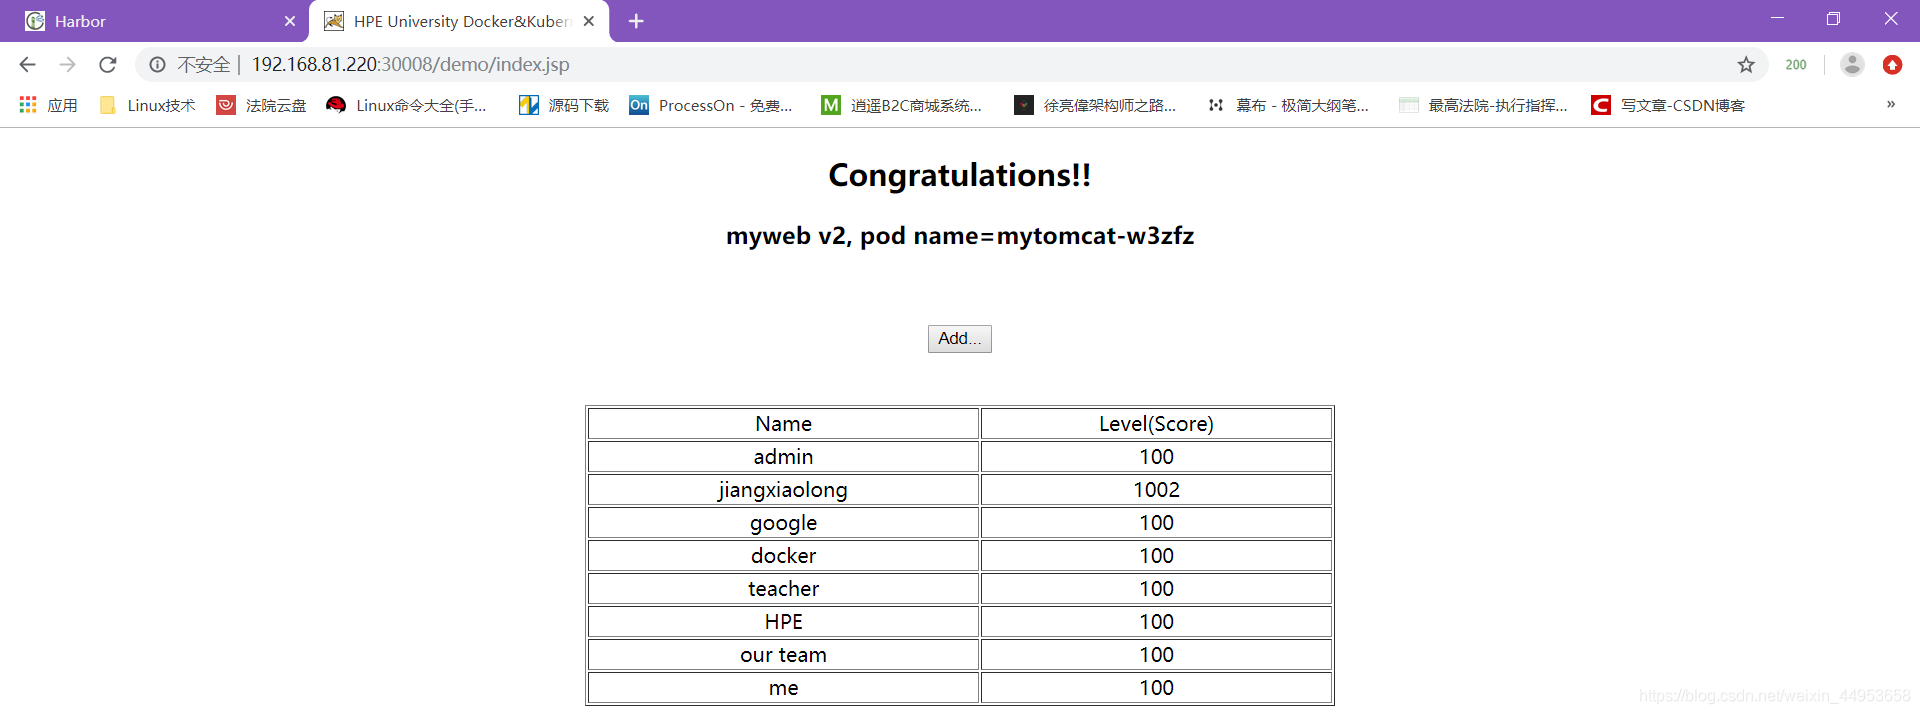
3)访问页面
http://192.168.81.220:30008/demo/index.jsp
访问成功表示dns成功
2.k8s集成heapster
heapster是kubernetes集群监控工具,在1.2的时候,kubernetes的监控需要在node节点上允许cadvisor作为agent收集本机和容器的资源数据,包括CPU、内存、网络、文件系统等,在新版的kubernetes中,cadvisor被集成到kubelet中,通过netstat就可以看到kubelet新开了一个4194的端口,这就是cadvisor监听的端口,现在我们可以通过http://nodeip:4194的方式访问到cadvisor,heapster就是通过每个node上的kubelet,也就是实际的cadvisor上收集数据并汇总,保存到后端存储中
heapster支持多种后端存储,包括influxdb、elasticsearch、kafka等
2.1.准备镜像
1)将镜像进行导入操作
[root@k8s-master ~]# mkdir heapster-influxdb
[root@k8s-master heapster-influxdb]# ls
docker_heapster_grafana.tar.gz   docker_heapster.tar.gz
docker_heapster_influxdb.tar.gz

[root@k8s-master heapster-influxdb]# for i in `ls *.gz`
> do
> docker load -i $i
> done

2)打标签推送到harbor
[root@k8s-master heapster-influxdb]# docker tag docker.io/kubernetes/heapster_grafana:v2.6.0 192.168.81.240/k8s/heapster_grafana:v2.6.0
[root@k8s-master heapster-influxdb]# docker tag docker.io/kubernetes/heapster_influxdb:v0.5 192.168.81.240/k8s/heapster_influxdb:v0.5
[root@k8s-master heapster-influxdb]# docker tag docker.io/kubernetes/heapster:canary 192.168.81.240/k8s/heapster:canary

[root@k8s-master heapster-influxdb]# docker push 192.168.81.240/k8s/heapster
[root@k8s-master heapster-influxdb]# docker push 192.168.81.240/k8s/heapster_grafana
[root@k8s-master heapster-influxdb]# docker push 192.168.81.240/k8s/heapster_influxdb
2.2.准备heapster-controller.yaml文件
[root@k8s-master heapster-influxdb]# vim heapster-controller.yaml
apiVersion: v1
kind: ReplicationController
metadata:
  labels:
    k8s-app: heapster
    name: heapster
    version: v6
  name: heapster
  namespace: kube-system
spec:
  replicas: 1
  selector:
    k8s-app: heapster
    version: v6
  template:
    metadata:
      labels:
        k8s-app: heapster
        version: v6
    spec:
      containers:
      - name: heapster
        image: 192.168.81.240/k8s/heapster:canary
        imagePullPolicy: Always
        command:
        - /heapster
        - --source=kubernetes:http://192.168.81.210:8080?inClusterConfig=false
        - --sink=influxdb:http://monitoring-influxdb:8086
2.3.准备heapster-service.yaml文件
[root@k8s-master heapster-influxdb]# vim heapster-service.yaml
apiVersion: v1
kind: Service
metadata:
  labels:
    kubernetes.io/cluster-service: 'true'
    kubernetes.io/name: Heapster
  name: heapster
  namespace: kube-system
spec:
  ports:
  - port: 80
    targetPort: 8082
  selector:
    k8s-app: heapster
2.4.准备influxdb-grafana-controller.yaml文件
[root@k8s-master heapster-influxdb]# vim influxdb-grafana-controller.yaml
apiVersion: v1
kind: ReplicationController
metadata:
  labels:
    name: influxGrafana
  name: influxdb-grafana
  namespace: kube-system
spec:
  replicas: 1
  selector:
    name: influxGrafana
  template:
apiVersion: v1
kind: ReplicationController
metadata:
  labels:
    name: influxGrafana
  name: influxdb-grafana
  namespace: kube-system
spec:
  replicas: 1
  selector:
    name: influxGrafana
  template:
    metadata:
      labels:
        name: influxGrafana
    spec:
      containers:
      - name: influxdb
        image: 192.168.81.240/k8s/heapster_influxdb:v0.5
        volumeMounts:
        - mountPath: /data
          name: influxdb-storage
      - name: grafana
        image: 192.168.81.240/k8s/heapster_grafana:v2.6.0
        env:
          - name: INFLUXDB_SERVICE_URL
            value: http://monitoring-influxdb:8086
            # The following env variables are required to make Grafana accessible via
            # the kubernetes api-server proxy. On production clusters, we recommend
            # removing these env variables, setup auth for grafana, and expose the grafana
            # service using a LoadBalancer or a public IP.
          - name: GF_AUTH_BASIC_ENABLED
            value: "false"
          - name: GF_AUTH_ANONYMOUS_ENABLED
            value: "true"
          - name: GF_AUTH_ANONYMOUS_ORG_ROLE
            value: Admin
          - name: GF_SERVER_ROOT_URL
            value: /api/v1/proxy/namespaces/kube-system/services/monitoring-grafana/
        volumeMounts:
        - mountPath: /var
          name: grafana-storage
      volumes:
      - name: influxdb-storage
        emptyDir: {}
      - name: grafana-storage
        emptyDir: {}
2.5.准备grafana-service.yaml文件
[root@k8s-master heapster-influxdb]# vim grafana-service.yaml

apiVersion: v1
kind: Service
metadata:
  labels:
    kubernetes.io/cluster-service: 'true'
    kubernetes.io/name: monitoring-grafana
  name: monitoring-grafana
  namespace: kube-system
spec:
  # In a production setup, we recommend accessing Grafana through an external Loadbalancer
  # or through a public IP.
  # type: LoadBalancer
  ports:
  - port: 80
    targetPort: 3000
  selector:
    name: influxGrafana
2.6.准备influxdb-service.yaml 文件
[root@k8s-master heapster-influxdb]# vim influxdb-service.yaml
apiVersion: v1
kind: Service
metadata:
  labels: null
  name: monitoring-influxdb
  namespace: kube-system
spec:
  ports:
  - name: http
    port: 8083
    targetPort: 8083
  - name: api
    port: 8086
    targetPort: 8086
  selector:
    name: influxGrafana
2.7.创建资源
1)创建资源
[root@k8s-master k8s]# kubectl create -f heapster-influxdb/
service "monitoring-grafana" created
replicationcontroller "heapster" created
service "heapster" created
replicationcontroller "influxdb-grafana" created
service "monitoring-influxdb" created


2)资源创建完成后,重启apiserver
[root@k8s-master k8s]# systemctl restart kube-apiserver.service
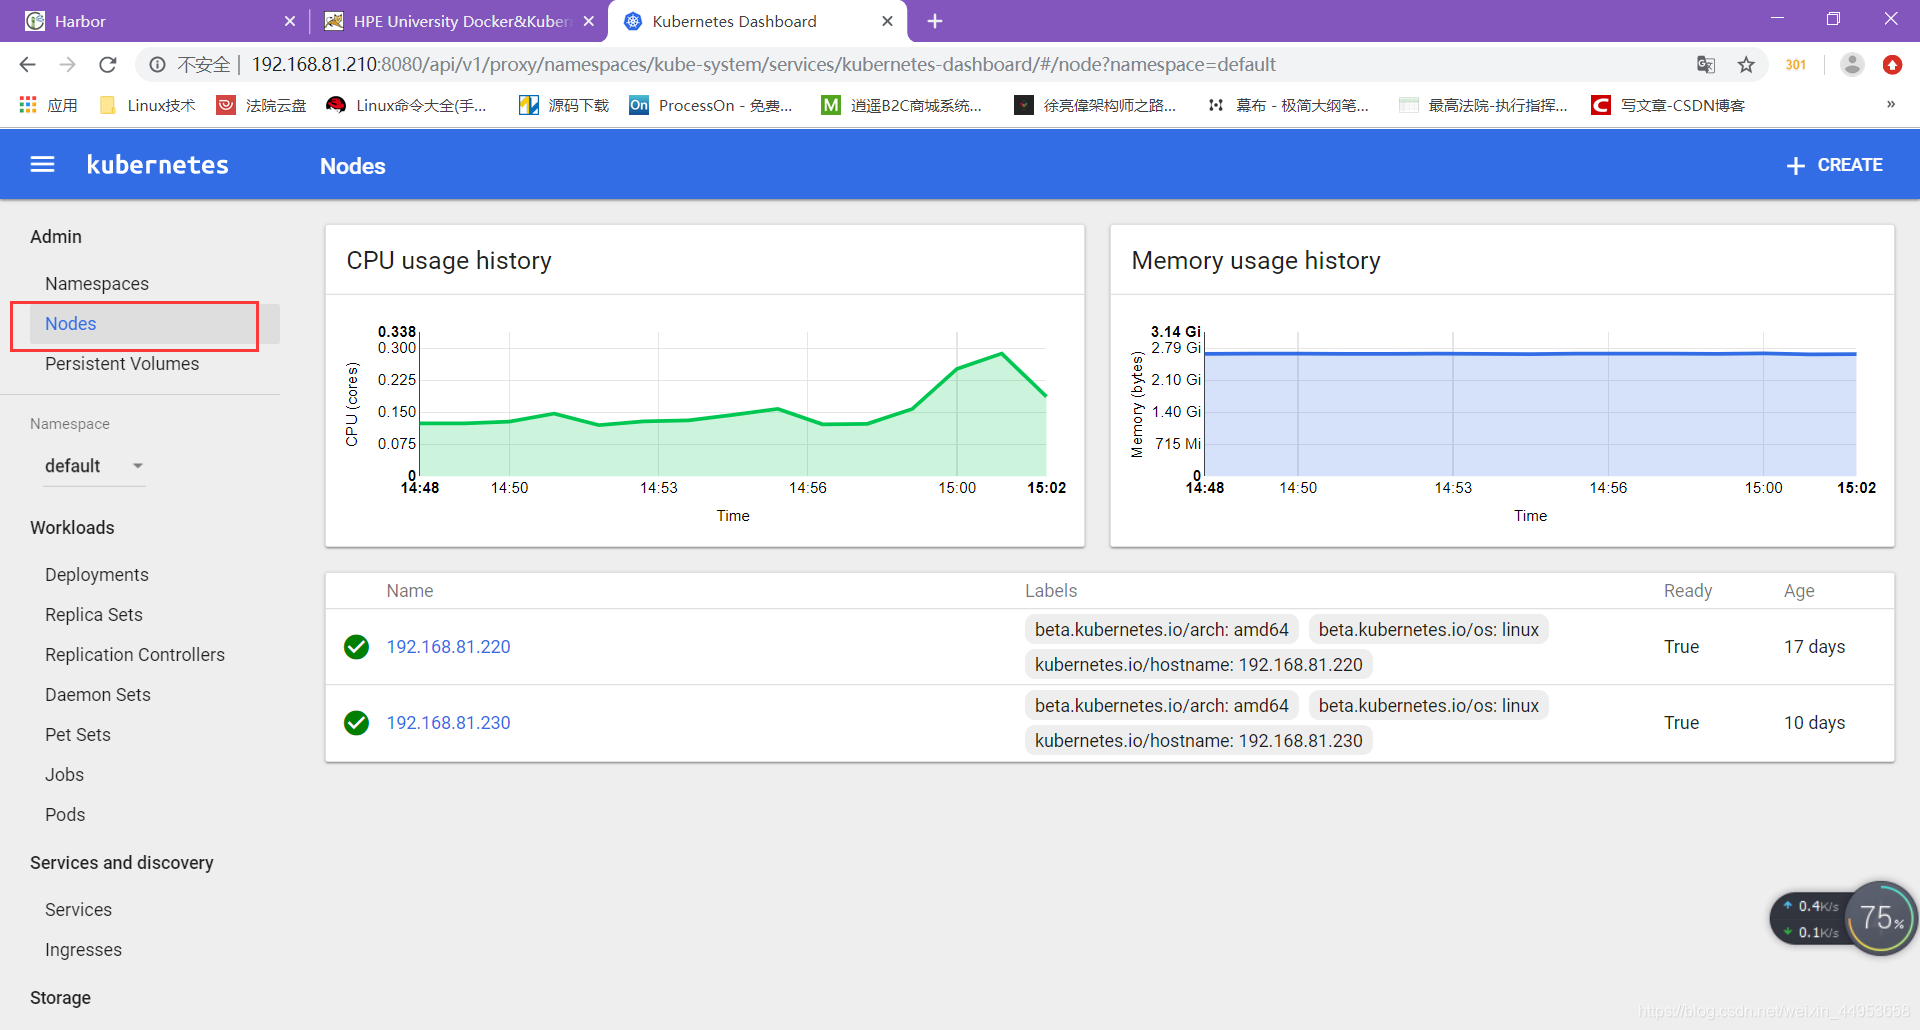
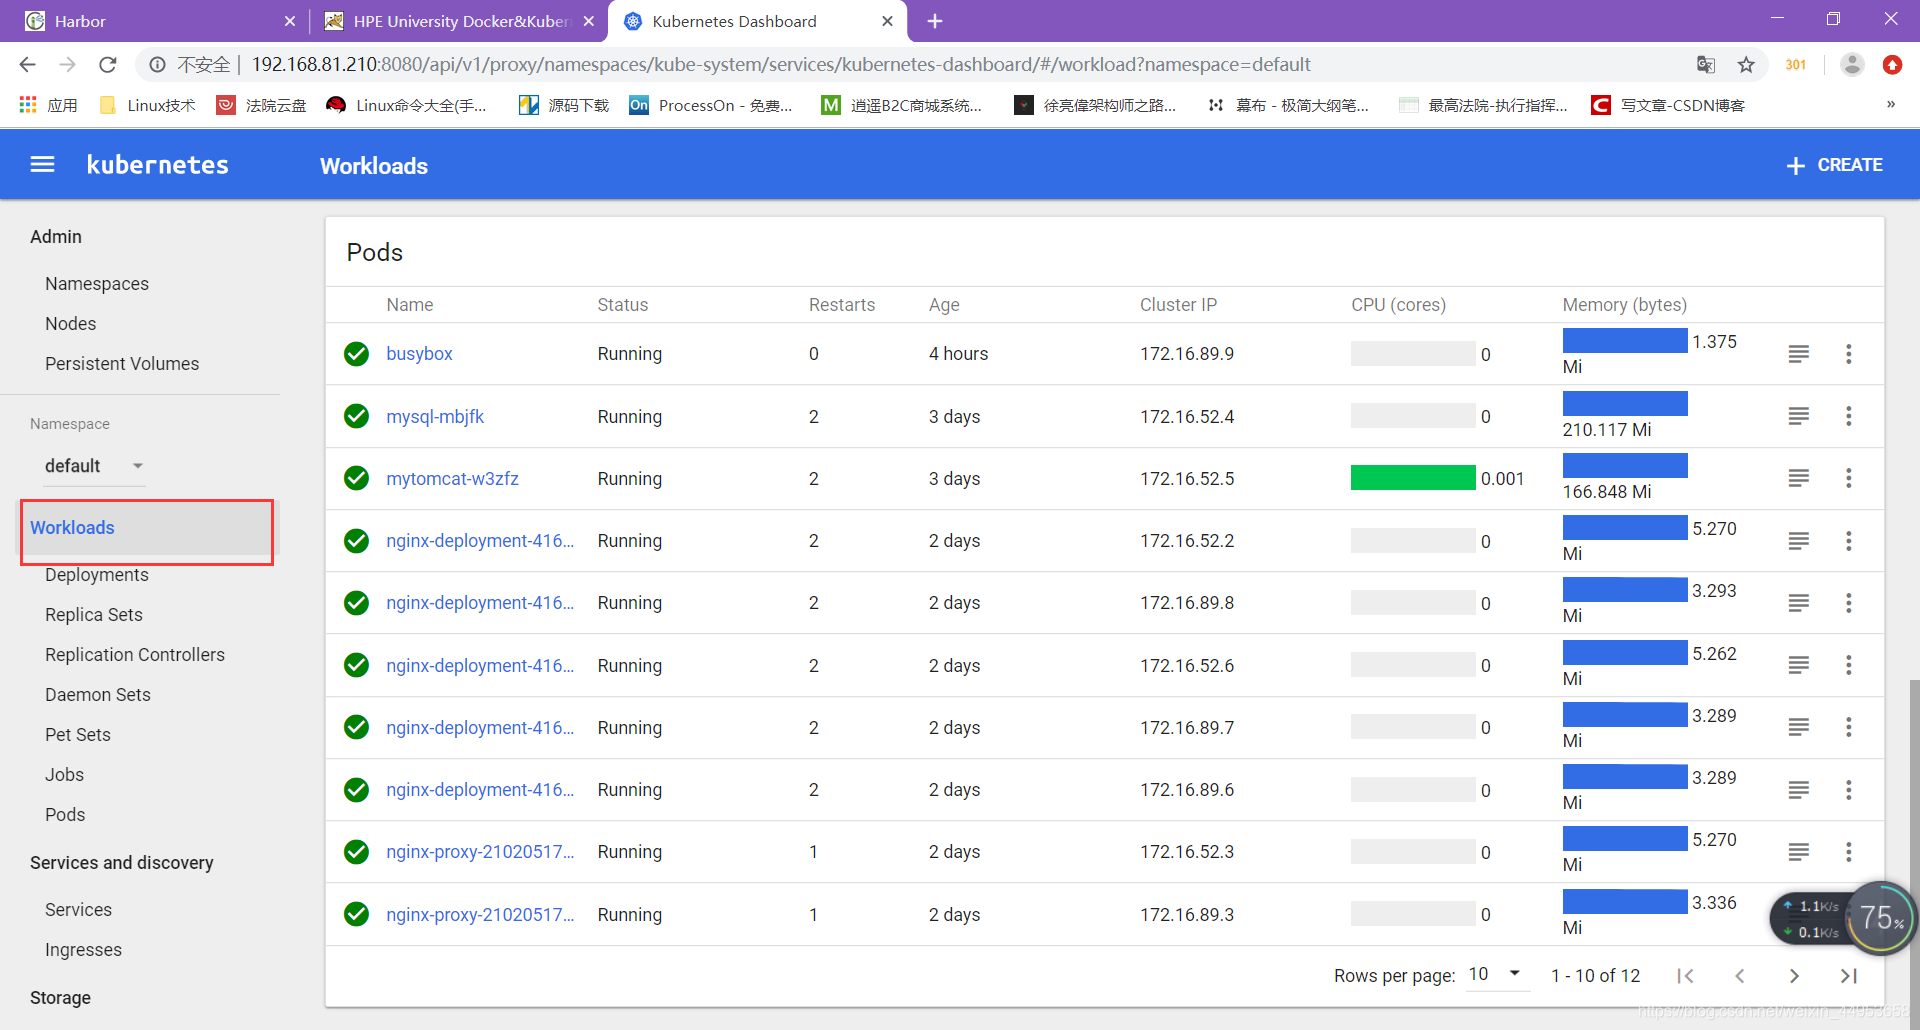
查看每个资源的使用情况
目录 返回
首页