CentOS7下yum安装GitLab-CE
前提准备
建立git用户
useradd git
关闭防火墙
systemctl stop firewalld
systemctl disable firewalld
安装依赖库
yum install curl openssh-server postfix cronie -y
service postfix start
chkconfig postfix on
配置yum源进行安装
注意: gitlab-ce 镜像仅支持 x86-64 架构
centos中可以直接通过配置yum源然后使用yum进行一键安装
国内可以使用的清华大学的镜像源安装GitLab,相关配置及安装参照:https://mirror.tuna.tsinghua.edu.cn/help/gitlab-ce/
以下内容写入yum源配置文件:/etc/yum.repos.d/gitlab-ce.repo
# vim /etc/yum.repos.d/gitlab-ce.repo
[gitlab-ce]
name=Gitlab CE Repository
baseurl=https://mirrors.tuna.tsinghua.edu.cn/gitlab-ce/yum/el$releasever/
gpgcheck=0
enabled=1
yum makecache
yum install gitlab-ce #自动安装最新版
# yum install gitlab-ce-x.x.x    #安装指定版本
# 安装成功后的提示:
Thank you for installing GitLab!
GitLab was unable to detect a valid hostname for your instance.
Please configure a URL for your GitLab instance by setting `external_url`
configuration in /etc/gitlab/gitlab.rb file.
Then, you can start your GitLab instance by running the following command:
  sudo gitlab-ctl reconfigure
默认路径
一键安装后可以利用rpm -ql gitlab-ce查询其文件安装路径及相关文件路径,其默认安装路径为/opt/gitlab/、程序数据及配置文件保存路径为/var/opt/gitlab下。
代码仓库保存位置:/var/opt/gitlab/git-data/repositories/
代码仓库备份位置:/var/opt/gitlab/backups/
postgresql数据及配置目录:/var/opt/gitlab/postgresql/data/
redis默认配置目录:/var/opt/gitlab/redis
gitlab主要配置文件:/etc/gitlab/gitlab.rb
常见配置
修改gitlab运行外部URL默认的访问地址
编辑/etc/gitlab/gitlab.rb
# 未修gitlab.rb配置文件中nginx配置时这个配置默认配置gitlab自带的nginx端口
external_url 'http://172.17.17.10:81'
修改之后使用如下命令重新加载配置且同时启动gitlab所有服务:
gitlab-ctl reconfigure
浏览器访问:http://172.17.17.10:81,被重定向到密码修改界面,修改密码为root的管理员账户,修改密码后自动跳转到登录页面,用root和修改后密码登录就可以

GitLab常用命令
gitlab-ctl start    # 启动所有 gitlab 组件
gitlab-ctl stop        # 停止所有 gitlab 组件
gitlab-ctl restart        # 重启所有 gitlab 组件
gitlab-ctl status        # 查看服务状态
gitlab-ctl reconfigure        # 启动服务
vim /etc/gitlab/gitlab.rb        # 修改默认的配置文件
gitlab-rake gitlab:check SANITIZE=true --trace    # 检查gitlab
sudo gitlab-ctl tail        # 查看日志
gitlab-ctl --help #查看更多命令
发送邮件配置
gitlab_rails['smtp_enable'] = true  #启用smtp服务
gitlab_rails['smtp_address'] = "mail.ultrapower.com.cn" #smtp发送服务器
gitlab_rails['smtp_port'] = 587
gitlab_rails['smtp_user_name'] = "xueming@ultrapower.com.cn"
gitlab_rails['smtp_password'] = "12333lzxcl"
gitlab_rails['smtp_domain'] = "ultrapower.com.cn"
gitlab_rails['smtp_authentication'] = "login"
gitlab_rails['smtp_enable_starttls_auto'] = true
gitlab_rails['smtp_tls'] = false
gitlab_rails['gitlab_email_from'] = 'xueming@ultrapower.com.cn'#与smtp_user_name一定要一样
gitlab_rails['gitlab_email_reply_to'] = 'xueming@ultrapower.com.cn'
命令测试:gitlab-rails console
防火墙开放端口
firewall-cmd --zone=public --list-ports #查看开放端口
firewall-cmd --zone=public --add-port=8081/tcp --permanent #开放8081端口
firewall-cmd --reload   #重新加载配置
#如果不需要,也可以直接关闭防火墙
systemctl stop firewalld.service
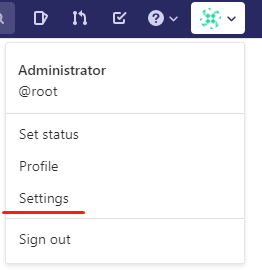
设置中文界面


刷新界面,就是中文的了
目录 返回
首页